
How to Clock In/Out
To clock in, click the green Clock In button at the top of the left hand menu. (If the menu is not displayed, click the 3 bar menu icon in the top left corner to reveal the left menu.)

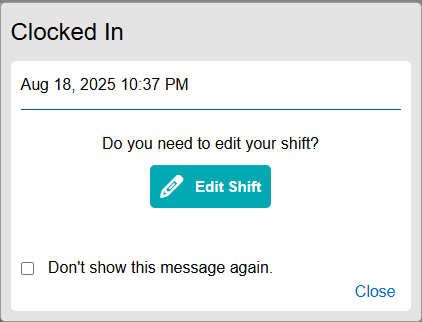
After clocking in, a confirmation window will appear displaying the in-time and other information along with an option to Edit Shift. The Edit Shift option allows users to select an Account Code, enter work notes, and request changes to their punch times.
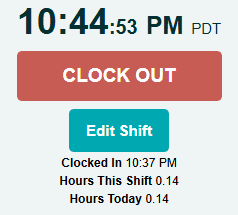
Once on the clock, the clock button will turn red and display Clock Out. To clock out, click the Clock Out button.
When and How You Can Edit a Shift
You can request changes to your shift at any point after you clock in by clicking the Edit Shift button under the Clock Out button.
The Edit Shift window has 3 tabs: Shift Details, Shift Times, and Info.
Use the Shift Details tab to select an Account Code or add work notes.
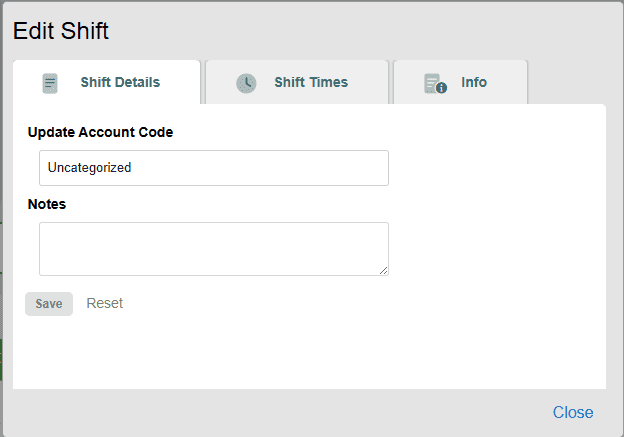
Remember to click Save after you select an item or enter a note.
Use the Shift Times tab if you need to modify the start time, end time, or recorded break on your shift.
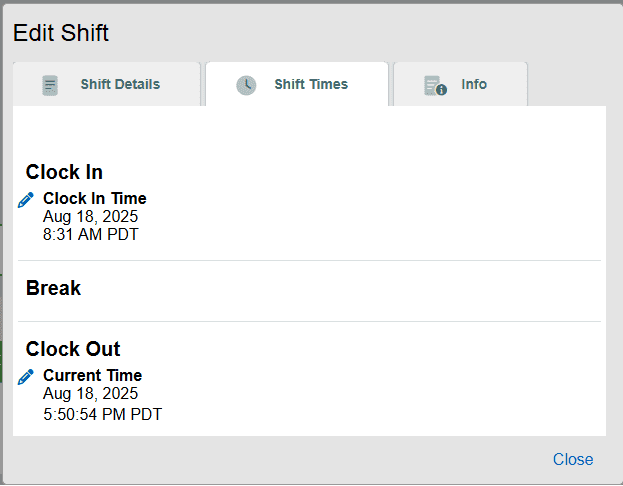
To edit a punch time, click the pencil icon to the left of the timestamp you want to modify. Change the time as required and, if necessary enter a reason for the edit. Remember Save to your edits before closing the window.
The Info tab is useful to review additional data such as the IP address where the punch occurred, Geolocation data, or Photo Timestamp data.
Once you’ve made the necessary changes and saved them, click Close at the bottom right to close the window.
Editing Permissions
Several permissions change how users interact with the Edit Shift window. These permissions can be adjusted from the Company Settings, Hourly tab and include the ability to edit records, require supervisor approval for edits, require a reason for edit, and other settings that affect user shifts.
To adjust individual user permissions, visit the Dashboard and click the gear icon to the left of the user’s name. Continue to the Options tab, then the Extended Security Permissions subpage. The settings on the Extended Security Permissions subpage determine if the individual user requires Supervisor Authorization each time they edit their timesheet. When authorization is required, Alerts are created for each user generated edit. If they are not required, users will be able to edit their timesheet without a supervisor’s approval.
Security Considerations
- When IP lock is enabled, if the user is not at an approved IP address, the Clock In/Out button will not display. Instead, the user will see a message informing them they are at an invalid location.
- When GEOPunch is enabled, the user may need to allow their browser to share their location data before being allowed to punch the clock.
- When Photo Timestamp is enabled, the user will need to allow use of the camera in order to punch the clock.