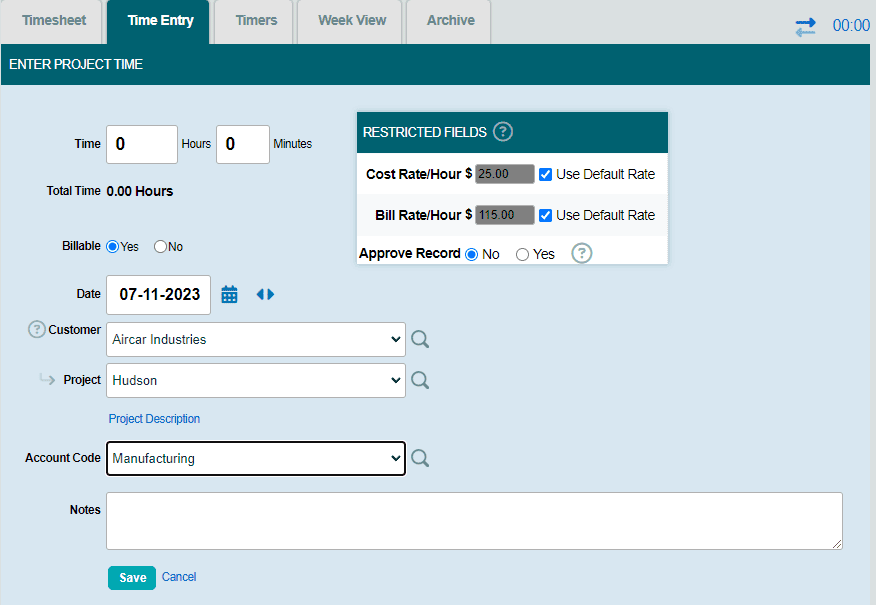
There are three ways to enter project time in Timesheets.com: the time entry form, project timers, and the week view form. Instructions for each method are outlined below.
The Time Entry Form
- Click My Timesheet in the left menu.
- Ensure that you are viewing the Project Time timesheet, and then click to the Time Entry tab to open the time entry form.
- Enter the total time for the record (in hours and minutes or hours and decimals).
- Set the date.
- If available as options, select whether or not the time is billable and make any necessary changes to the rates.
- Choose from the available list item selections (customer, project, and account code).
- Enter your work notes.
- Click the Save button to complete the process.

Timers
- Click My Timesheet in the left menu.
- Ensure that you are viewing the Project Time timesheet, and then click to the Timers tab.
- Select the appropriate customer, project, and account code from the drop-down menus.
- Click the Start New Timer button.
- Once initiated, you will see notification that a timer is running displayed in the table below the form, with Pause and Stop controls located to the right.
- Depending on your account configuration, you may be able to run multiple timers simultaneously. Otherwise, starting a new timer will automatically pause any running timer.
- Click the Pause Timer or Stop Timer button at the bottom of the page to stop the timer from running. Paused timers may be resumed while stopped timers will appear on the timesheet as a completed time entry.

Week View
- Click My Timesheet in the left menu.
- Ensure that you are viewing the Project Time timesheet, and then click to the Week View tab.
- Navigate through weeks using the Last Week and Next Week links in the upper-left and upper-right corners of the form, or set the Week Start Date and press the Go button to adjust the view.
- Enter time by clicking into a blank cell and following the steps for entering time using the time entry form above.
Notes:
- Each new combination of customer, project, and account code will create a new row in the table.
- All records for the entire week can be copied to the following week using the Copy This Week To Next Week button.
- Time entered into the week view will appear on the main Timesheet tab.

